Configuring Production & Staging environment for React Native

Hello world…
In this tutorial we will configure our React Native app for Production and Staging environment.
Scope of this tutorial:
1. Create 2 flavours: Staging & Prod
2. Configure react-native-config to use separate .env files for respective flavours.
Let’s start by setting up flavours for our Production and Staging app. We will name the flavours
prodandstagingrespectively.
Create flavours for android app
Step 1. Add this in android/app/build.gradle
android {
...flavorDimensions "default"productFlavors {prod {minSdkVersion rootProject.ext.minSdkVersionapplicationId 'com.rn_base'targetSdkVersion rootProject.ext.targetSdkVersionresValue "string", "build_config_package", "com.rn_base"}staging {minSdkVersion rootProject.ext.minSdkVersionapplicationId 'com.rn_base.staging'targetSdkVersion rootProject.ext.targetSdkVersionresValue "string", "build_config_package", "com.rn_base"}}}
Application id is the bundle id of the app, it should match with the package name in your AndroidManifest.xml
For our project the application id is com.rn_base
For staging flavour we add a suffix .staging to our application id.
Step 2. Change the app name according to flavours
Prod app name: RN Base
Staging app name: RN Base Staging
- To change the prod app name. Go to,
android/app/src/main/res/values/strings.xml
// strings.xml
<resources><string name="app_name">RN Base</string></resources>
- To change the staging app name. Go to,
android/app/src/main
Create new folders inside main/staging/res/values
Inside values folder, create strings.xml
// strings.xml
<resources><string name="app_name">RN Base Staging</string></resources>
Step 3. Run the app
- Run the prod debug app
npx react-native run-android --variant=prodDebug- Run the staging debug app
npx react-native run-android --variant=stagingDebug --appIdSuffix=staging- For release apps,
use variantprodReleaseandstagingReleaserespectively.
This will install separate apps for production and staging. That means we can have both the apps installed on a device at same time.
Create flavours for iOS app
Open your project on Xcode.
Step 1. Add new configurations
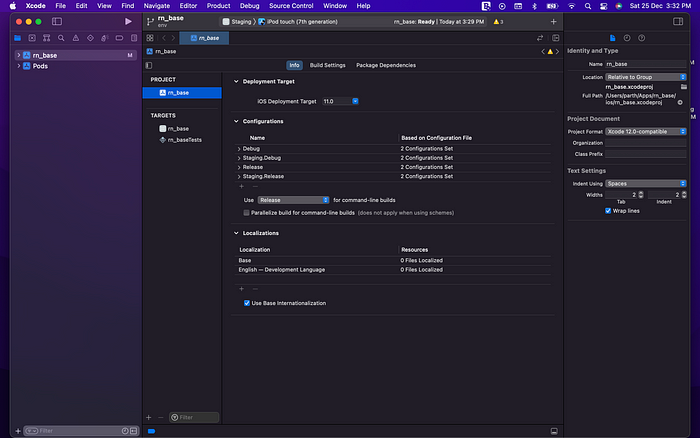
- Select your project under PROJECT in Xcode.
- Go to Info tab.
- Look for Configurations, you will see Debug & Release configurations.
- Press + and duplicate both of them, name them Staging.Debug and Staging.Release respectively.
Step 2. Add new schemes
- Click on Product > Scheme > Edit Scheme to open scheme manager window.
- Click on Duplicate Scheme button & name the new scheme Staging.
- Change the Build configuration of Run, Test, Analyze to Staging.Debug.
- Change the Build configuration of Profile, Archive to Staging.Release.
- Enable Shared from the checkbox on the bottom of the window.
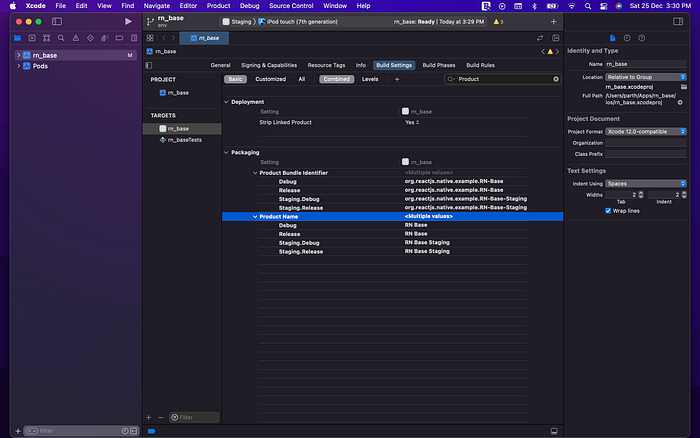
Step 3. Change App name for both the flavours
- In info.plist, change Bundle display name to $(PRODUCT_NAME).
- Select app Target and in Build Settings tab, look for Product Name.
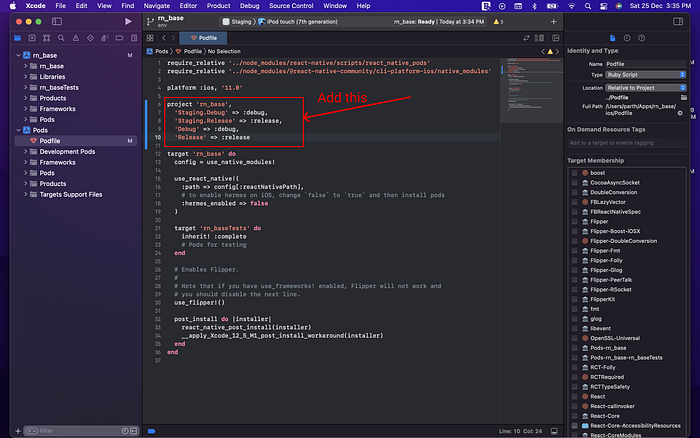
Step 4. In ios/Podfile, add
Step 5. Add bundle id suffix to be able to install both the flavours at same time
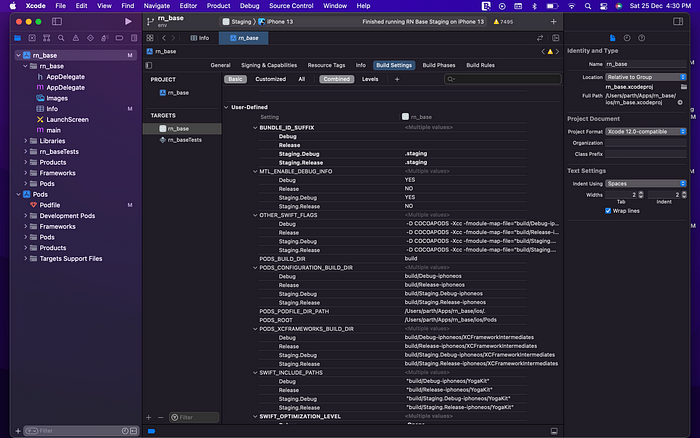
- Select app Target and go to the Build Settings tab.
- Click on + > Add User-defined settings.
- Name the setting BUNDLE_ID_SUFFIX, and add suffix .staging to Staging.Debug and Staging.Release.
- In info.plist change Bundle Identifier to $(PRODUCT_BUNDLE_IDENTIFIER)$(BUNDLE_ID_SUFFIX)
Step 6. Run the app
- Run Prod debug app,
npx react-native run-ios --configuration=Debug- Run Prod release app,
npx react-native run-ios --configuration=Release- Run Staging debug app,
npx react-native run-ios --scheme=Staging --configuration=Staging.Debug- Run Staging release app,
npx react-native run-ios --scheme=Staging --configuration=Staging.ReleaseNow, we will use react-native-config to configure the app to use separate .env files for our flavours
Configure environment configs for the flavours
We will use react-native-config to configure the app to use separate .env files for our flavours.
We will create .env.staging & .env.prod env files and configure the app to use them according to the respective flavours.
Step 1. Install react-native-config
$ yarn add react-native-config$ cd ios
$ pod install
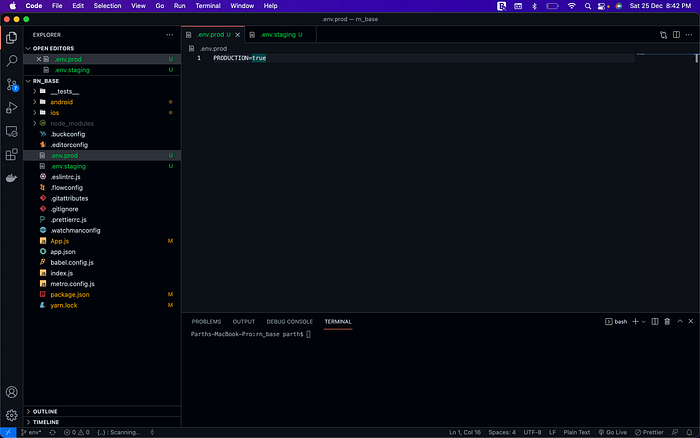
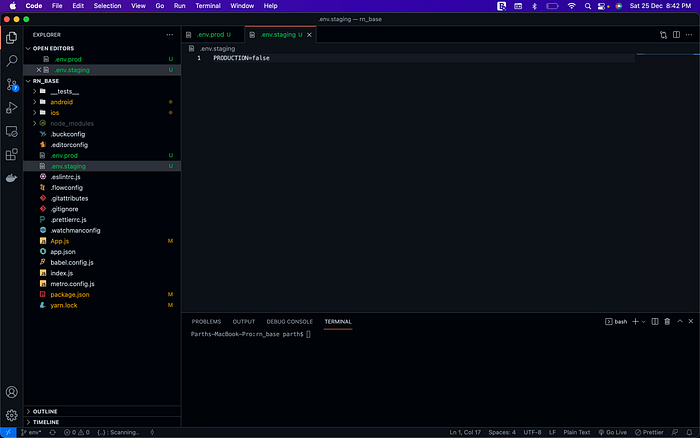
Step 2. Create 2 files .env.staging and .env.prod in the root directory of your project
Step 3. Configuration for android
In you android/app/build.gradle, before first apply from…call add,
project.ext.envConfigFiles = [staging: ".env.staging",prod: ".env.prod",]apply from: project(':react-native-config').projectDir.getPath() + "/dotenv.gradle"
This will let the gradle know which .env to pick up for which flavour for our android app.
Here, we are configuring gradle to pick environment variables from .env.staging for Staging flavour and from .env.prod for Prod flavour.
Step 4. Configuration for iOS:
- In the Xcode menu, go to Product > Scheme > Edit Scheme.
- Select scheme
rn_basewhich is the prod scheme for our app. - Expand the Build settings on left.
- Click Pre-actions, and under the + sign select New Run Script Action.
- Where it says Type a script or drag a script file, type:
cp "${PROJECT_DIR}/../.env.prod" "${PROJECT_DIR}/../.env" 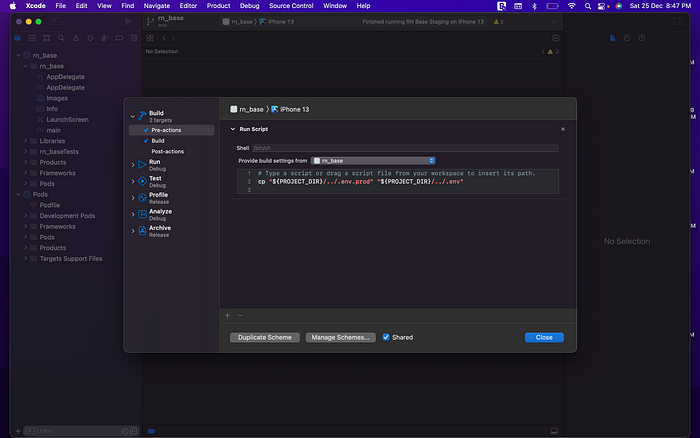
- Now select Staging scheme, and repeat the steps until New Run Script Action
- Where it says Type a script or drag a script file, type:
cp "${PROJECT_DIR}/../.env.staging" "${PROJECT_DIR}/../.env"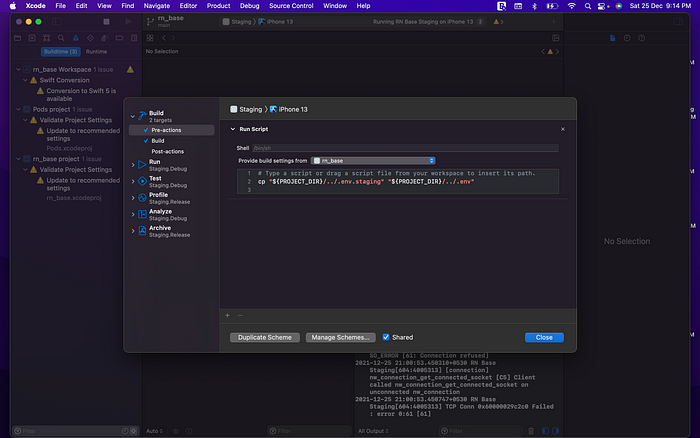
These steps add a build script which makes sure to copy the appropriate environment file to .env file, which is then used while building the app.
You can add your env files to your .gitignore file, in case it contains any secrets you don’t want to check into your version control.
Thanks for reading.
I hope you enjoyed this article and it helped you in some way.
More articles to come. Stay tuned.
You can find the code for this tutorial in this repo.
Also, find me on LinkedIn.